

Hey everyone. Welcome to today’s tutorial. In today’s tutorial, we will learn how to create a Pixel-Em converter. To build this project, we need HTML, CSS and JavaScript. This is a beginner-friendly project. It would be a perfect project to polish your skills if you are a JavaScript beginner.
I have 60+ more such JavaScript projects with source code on my YouTube channel. You can check them here. The difficulty of these projects varies from easy to complex.
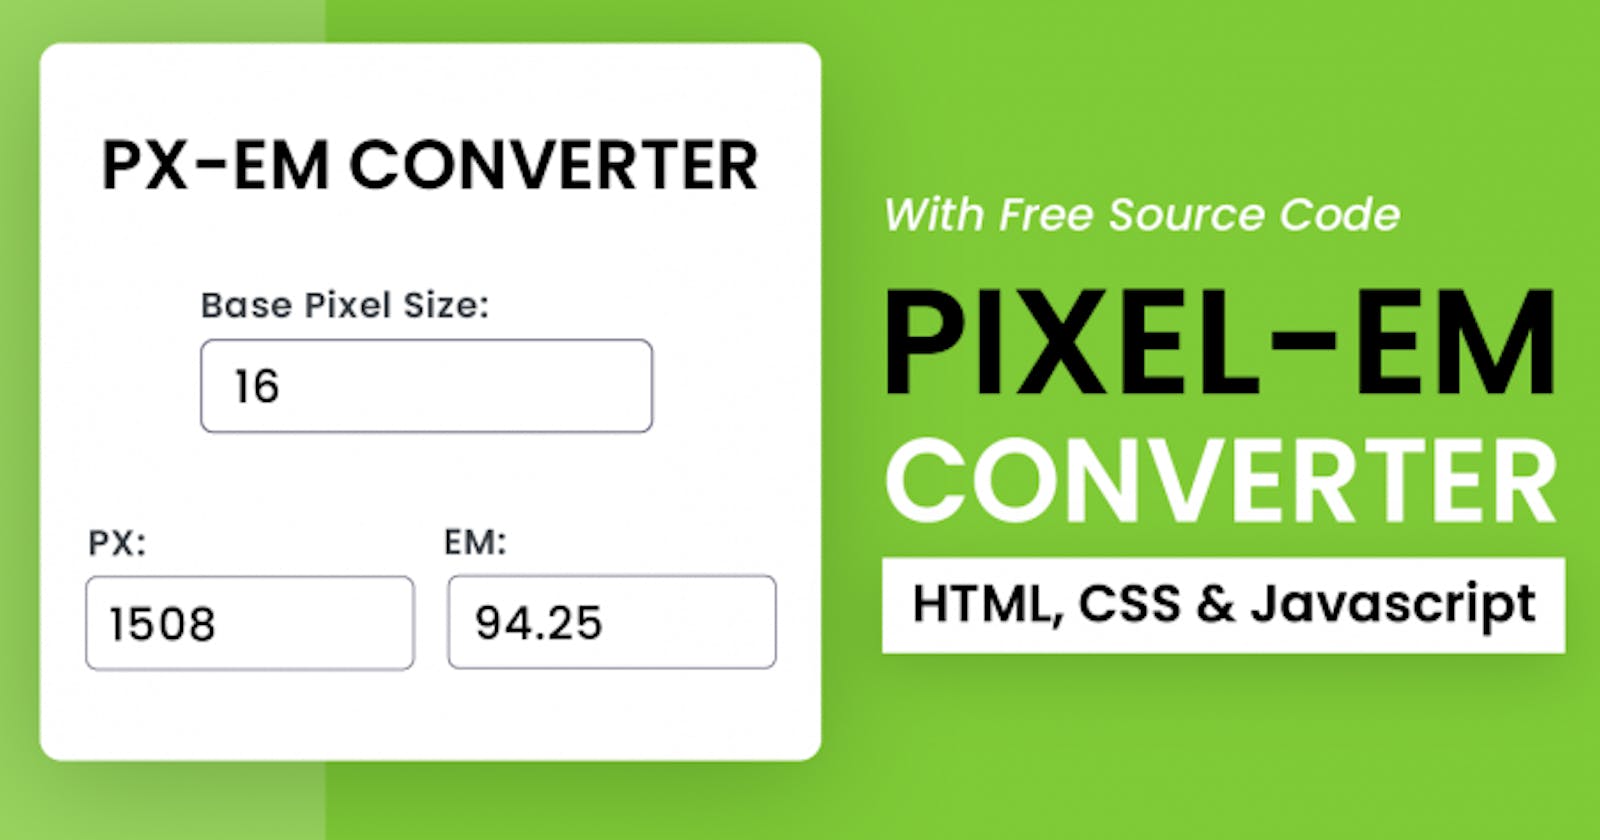
This converter consists of three input fields. The first one is the base pixel size. We set its default value to 16. When the user inputs a value in the PX field, he automatically receives the converted EM value in the EM field. Likewise, when the user enters a value in the EM field, it generates the corresponding PX value. The user can also change the base font size.
Video Tutorial:
If you like to learn by watching a video tutorial rather than reading this blog post, you can check it out here down below. Also, don’t forget to subscribe to my YouTube channel where I post tutorials, tips and resources regularly.
Project Folder Structure:
Before we move on to the actual coding, let us take a look at the project folder structure. We start by creating a project folder called — “Pixel-Em Calculator”. Inside this folder, we have three files — index.html, style.css and script.js. These files are HTML document, stylesheet and script file respectively.
HTML:
Let us begin with the HTML code. Copy the code below and paste it into your HTML document. This creates the layout of our converter.
<!DOCTYPE html>
<html lang="en">
  <head>
    <meta name="viewport" content="width=device-width, initial-scale=1.0" />
    <title>Pixel-EM Calculator</title>
    <!-- Google Font -->
    <link
      href="https://fonts.googleapis.com/css2?family=Poppins:wght@400;600&display=swap"
      rel="stylesheet"
    />
    <!-- Stylesheet -->
    <link rel="stylesheet" href="style.css" />
  </head>
  <body>
    <div class="container">
      <h1>PX-EM Converter</h1>
      <div class="wrapper">
        <label for="inp-base-px">Base Pixel Size:</label>
        <input type="number" id="inp-base-px" value="16" />
      </div>
      <div class="wrapper">
        <div class="inp-wrapper">
          <label for="inp-px">PX:</label>
          <input type="number" id="inp-px" placeholder="px" />
        </div>
        <div class="inp-wrapper">
          <label for="inp-em">EM:</label>
          <input type="number" id="inp-em" placeholder="em" />
        </div>
      </div>
    </div>
    <!-- Script -->
    <script src="script.js"></script>
  </body>
</html>
CSS:
We now style this px-em converter using CSS. For this copy the code below and paste it into your stylesheet.
* {
  padding: 0;
  margin: 0;
  box-sizing: border-box;
  font-family: "Poppins", sans-serif;
}
body {
  background-color: #7fca37;
}
.container {
  background-color: #ffffff;
  width: 80vmin;
  font-size: 16px;
  position: absolute;
  transform: translate(-50%, -50%);
  top: 50%;
  left: 50%;
  padding: 4em 1.8em;
  border-radius: 0.6em;
  box-shadow: 0 0.7em 3em rgba(44, 71, 18, 0.4);
}
h1 {
  width: 100%;
  text-align: center;
  font-size: 2.8em;
}
label {
  display: block;
  font-weight: 600;
  font-size: 1.1em;
  color: #3c354e;
}
input {
  width: 100%;
  font-size: 1.25em;
  padding: 0.6em 0.55em;
  margin-top: 0.5em;
  border-radius: 0.2em;
  border: 1px solid #0a0125;
}
.container .wrapper:nth-child(2) {
  width: 50%;
  margin: 3em auto 1.25em auto;
}
.container .wrapper:nth-child(3) {
  display: flex;
  flex-direction: row;
  justify-content: space-between;
  gap: 0.6em;
}
@media screen and (max-width: 575px) {
  .container {
    font-size: 14px;
  }
  .container .wrapper:nth-child(2) {
    width: 100%;
    margin: 3.5em auto 0.6em auto;
  }
  .container .wrapper:nth-child(3) {
    flex-direction: column;
  }
}
Javascript:
Finally, we add functionality to this converter. To do so we need javascript. Now copy the code below and paste it into your script file.
Other Tutorials You Might Like:
let inpBase = document.getElementById("inp-base-px");
let inpPX = document.getElementById("inp-px");
let inpEM = document.getElementById("inp-em");

//Function to convert pixels to em
let pxToEm = () => {
  let inpBaseValue = inpBase.value;
  let pxValue = inpPX.value;
  //Checking if input field is not empty
  //If not empty then calculate the EM value
  if (pxValue.length != 0) {
    inpEM.value = pxValue / inpBaseValue;
  }
  //If empty then clear EM field
  else {
    inpEM.value = "";
  }
};

//Function to convert em to pixel
let emToPx = () => {
  let inpBaseValue = inpBase.value;
  let emValue = inpEM.value;
  //Checking if input field is not empty
  //If not empty then calculate the pixel value
  if (emValue.length != 0) {
    inpPX.value = emValue * inpBaseValue;
  }
  //If empty then clear the PX field
  else {
    inpPX.value = "";
  }
};

//Function to calculate EM and PX when Base Font Size is changed
let calcEmPx = () => {
  //Checking if input field is not empty
  //If not empty then run emToPx()/pxToEm()
  if (inpBase.value.length != 0) {
    emToPx();
  }
  //If empty then clear PX and EM field
  else {
    inpPX.value = "";
    inpEM.value = "";
  }
};

//Adding oninput event to each input field
inpPX.oninput = pxToEm;
inpEM.oninput = emToPx;
inpBase.oninput = calcEmPx;
Our PX-EM Converter is now ready. If you face any issues while creating this code you can download the source code by clicking on the download button below. Also don’t forget to leave your queries, suggestions and feedback in the comments below.
Happy Coding!